Before you begin
You need a Mac running macOS 15.4 or later, a stereo input, a stereo output and a line-level signal from the record player. A single duplex audio interface may provide both directions, or the input and output may be separate devices.
Install the application
- Download and open the current VinylRest Live Beta disk image.
- Drag VinylRest Live to the Applications folder.
- Eject the disk image, then open VinylRest Live from Applications.
- Connect and power the input and output devices before selecting the audio route.
VinylRest Live 1.20b1 is a Universal 2 application that runs natively on Apple silicon and Intel Macs.
Activate the free Beta
Live processing requires a free Beta license. On first launch, request a license in the native window or enter a key already delivered to you, then select Activate. Internet access is required.
See Beta license and activation for the complete request, recovery, validation, installation and update workflow.
Grant macOS permissions
- Microphone
- Required for audio input. macOS normally asks when processing is started for the first time. Select Allow. If access was denied, open System Settings → Privacy & Security → Microphone, enable VinylRest Live and relaunch the application.
- Local Network
- Required only when the optional HTTP server and remote WebApp are enabled. Select Allow if you intend to control VinylRest Live from another device on the LAN.
- Apple Music catalog
- No permission to your personal music library is requested. Internet access is used only for optional English genre enrichment from the public catalog after a Shazam match; repair and audio transport do not depend on it.
If a permission changes while VinylRest Live is open, quit and reopen the application before trying the audio path again.
Select the audio route
- In the Audio devices card, choose the hardware or virtual device that receives the stereo signal from the phono system under Input.
- Choose the device connected to the listening system under Output.
- Choose one entry under Format. Only exact stereo formats reported by both devices appear.
- If a newly connected device is missing, select Refresh.
Input and output must use the same sample rate and bit depth. Supported combinations are stereo 16-bit or 24-bit at 32, 44.1, 48, 64, 88.2, 96, 128, 176.4 or 192 kHz. VinylRest Live does not insert a general sample-rate converter between mismatched nominal device formats.
The three selectors lock while the transport is active. Select Stop before changing Input, Output or Format. An external device-rate change during processing stops the transport rather than silently changing the session.
Fresh-install defaults
A new installation starts with settings intended to protect musical transients while the audio path is being evaluated.
| Control | Initial setting | Meaning |
|---|---|---|
| Correction profile | Mid | Current default AutoNG sensitivity curves |
| Generation | NG2 | Fixed product generation for the complete DeClick → DeCrackle chain |
| DeClick | Auto | Independent first-stage sensitivity; 0 is exact bypass |
| DeCrackle | Auto | Independent second-stage sensitivity; 0 is exact bypass |
| Noise reduction | S150 · On | Conservative NRNG profile after both repair stages |
| NR Auto | On | Uses the shared grade-dependent NR maximum, capped at 12 dB |
| Pitch / reverse | Fixed by NG2 | NG2 uses the listened sequential reconstruction configuration |
| Signal | Repaired | The restored signal is sent to the output |
| Master gain | +0.0 dB | Unity software gain |
| Buffering profile | Safe | Largest playback reserve |
Saved choices are restored on later launches, so an existing installation may not show these values.
Choose buffering and calibrate the input
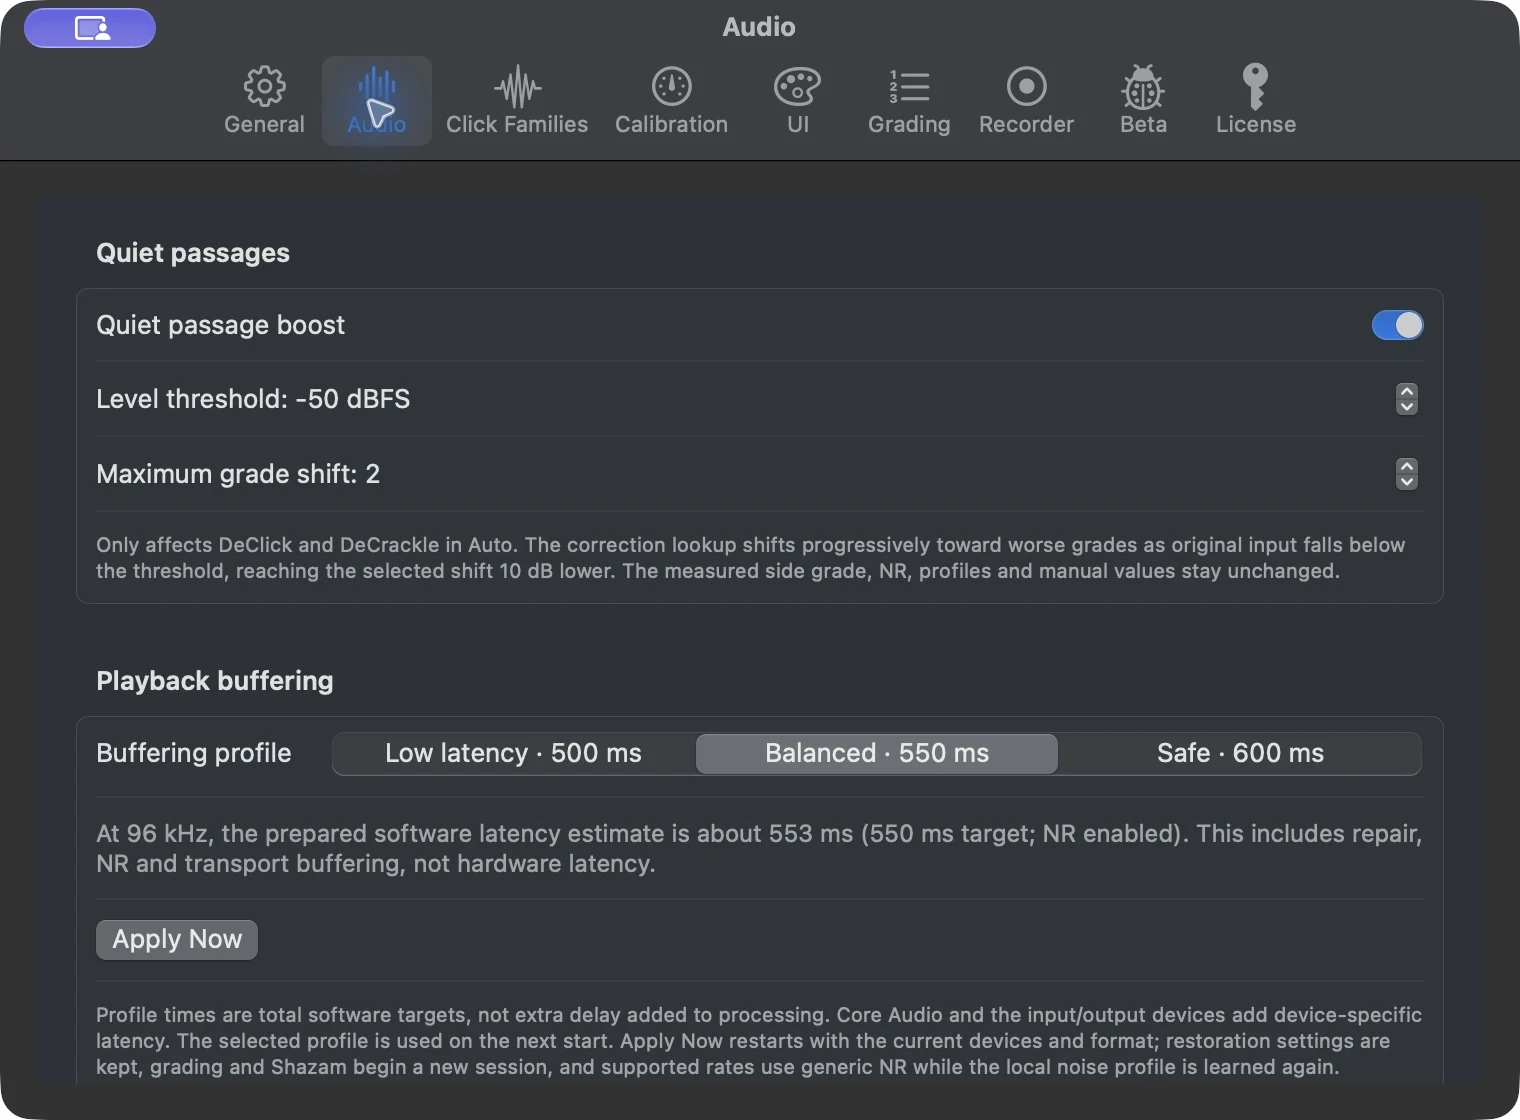
Open Settings → Audio. Low latency, Balanced and Safe target approximately 500, 550 and 600 ms of total software delay respectively. Safe is the fresh-install default and the best first choice for reserve. Device and processing requirements can add delay; the displayed estimate is not a complete end-to-end measurement.
A changed profile applies at the next Start. Apply Now deliberately restarts running audio, beginning fresh grading, recognition and noise acquisition. Qualify a lower-latency profile by listening through a full side and checking Engine Misses, XRuns and Errors.
Once the route is stable, use Settings → Calibration to check hardware balance, system silence and surface noise. A true mono input reference is required for balance; calibration suggestions are applied only when you choose them.
Start the first record
- Set the amplifier or downstream monitor to a low level and cue the record.
- Select Start. The status passes through configuration and priming before reporting that audio is being processed.
- Confirm that the Audio level L and R meters respond. Regular peaks should remain below 0 dB.
- Listen first with Signal → Repaired, then compare briefly with the time-aligned Original. Use All, Clicks or Noise only to inspect what each restoration stage removes.
- Watch Transport. XRuns and Errors should remain at zero.
DeClick Auto and DeCrackle Auto begin with bounded fallback values until approximately 3.6 seconds of reference audio are ready, then update about every 1.8 seconds. After a qualified side begins, NRNG observes a four-second acquisition interval and selects a median-level one-second local noise candidate below the configured maximum. A Generic fallback can operate at supported rates while acquisition proceeds. S150/S200 stays within the shared grade-dependent NR maximum, capped at 12 dB. The stable media grade needs complete windows of approximately ten seconds and therefore appears later.
Optional tone and room correction
After checking restoration, open Sound Shaping. Warmth/Air affects Repaired only. Compatible Roon-format stereo matrix ZIP filters, including Home Audio Fidelity packages, require an impulse-response set at the exact session rate.
Import on Mac, select the profile, then manually Stop and Start to apply a pending selection. Convolution also affects Original, so that comparison retains the room filter. Follow the complete import and activation procedure.
Stop safely
Select Stop before unplugging a device or changing its nominal format. Stopping preserves the cumulative grading session and the visible Audio Repaired history; Reset grading starts a new grade without stopping audio.